1-0: Introducing \(\LaTeX\)
This part of the course is about LaTeX, a set of tools for communication. The most famous feature of LaTeX is its excellent system for typesetting mathematics. For example, you can create the formula
\[(z-1)! = \int_0^\infty \exp(-t) \cdot t^{z-1} \textrm{d}t\]
using the following LaTeX code:
$(z-1)! = \int_0^\infty \exp(-t) \cdot t^{z-1} \textrm{d}t$
We’ll be explaining the different parts of the LaTeX language as the course proceeds. But, you can see the general idea in this example: there is some literal text like (z-1)!, some special symbols like \int, and some other things like $$, \ and {} that help specify unambiguously exactly what we want LaTeX to do.
There is even a command \LaTeX which produces the official logo of the language: \(\LaTeX\). But, we will usually be less formal and just write LaTeX.
LaTeX is not limited to mathematics. It offers many features that would be useful even if you are writing a cookbook or a history book:
- a set of tools for automatically creating citations (
\cite) and bibliographies (bibtex), - commands to create a
\sectionor to refer back to parts of your document (\ref), - packages that allow you to create posters or PowerPoint-style presentations, and
- the ability to define your own custom commands!
While there are thousands of additional features and add-ons to the language, the goal in Math 600 is to explain just the fundamentals. By the end of the course you will be able to write a homework assignment or a set of solutions, and you will see how to include external graphics in the document. More importantly, you will be comfortable enough with the basic system that you will be able to understand online resources that document any additional packages you want to explore.
Your First \(\LaTeX\) Document
A major component of this course is using LaTeX hands-on. Right now, we will ask you to create a very basic LaTeX document, in order to get you familiar with the software.
LaTeX is normally stored in files with the extension .tex, although there is nothing special about the stored format of the file to distinguish it from a vanilla .txt file.
This is the LaTeX source code that we will use:
\documentclass{article}
\begin{document}
Hello, world!
\end{document}
This source code will produce a one-page document containing only the text “Hello, world!” and a page number at the bottom. The text will look like this:
\[\text{Hello, world!}\]
and the overall page will look like this:

The most useful output format of LaTeX for our purposes is PDF (portable document format), which users on all computer systems can easily read and print. LaTeX can also produce other types of output but we’ll focus on PDFs for this course. The PDF that you produce will look like the file contained in this link (click here).
LaTeX is open-source software created initially in the 1980s, and consequently it is well-supported in all modern operating systems. There are many editors to choose from, but they all provide the same core functionality — the differences usually are about the user interface and convenience features.
For this course, we will focus on two editors:
- TeXworks, available on Windows and Mac OSX
- ShareLaTeX, an online cloud editor
We suggest these two because they have a beginner-friendly feature set. If you have questions about TeXworks or ShareLaTeX, go ahead and ask about them in the forums (Software Issues). If you have a different favourite editor you can use it — they all compile LaTeX documents in fundamentally the same way — but we won’t be able to provide technical support.
You don’t need to use both editors, just one is fine. Between the two editors, we think TeXworks is more educational, and it allows you to work even without an internet connection. However, if you don’t have a computer on which you can install your own software, ShareLaTeX is a great option.
Exercise
This exercise is not to be handed in. You can discuss any or all aspects of it that you find necessary in the forums.Install LaTeX following one of the sets of instructions below. Create a \(\text{Hello, world!}\) document. If you get stuck along the way, visit the forum where you can get help with the process. If you are feeling adventurous, try changing some parts of the source code and see if it still compiles, or crashes and gives you error messages.
The instructions below cover
- Windows: installation of TeXworks
- OSX: installation of TeXworks
- Windows and OSX: compiling a document in TeXworks
- and, compiling a document in ShareLaTeX.
Installing TeXworks on a Windows Operating System
You should install MiKTeX, which is a Windows distribution of LaTeX (i.e., the compiler and all other tools). It comes with TeXworks automatically. To begin, go to http://www.miktex.org/download.
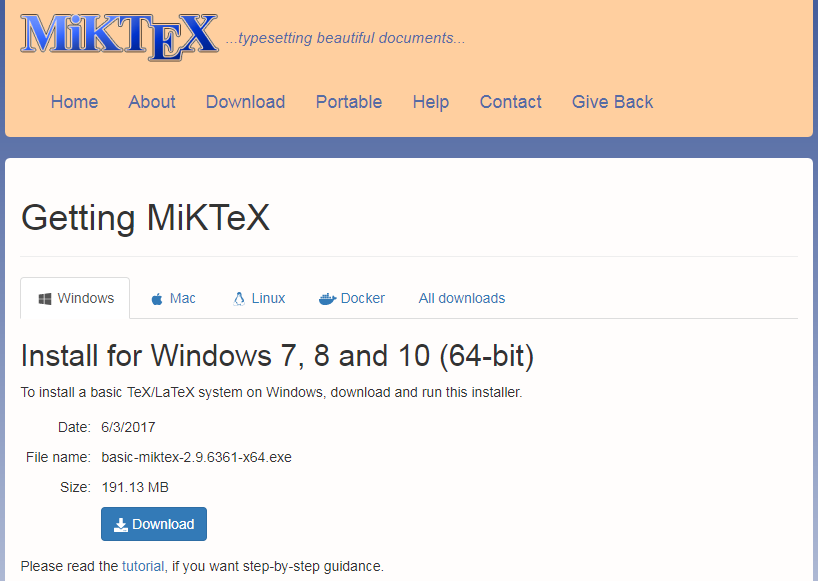
Download the “Basic MiKTeX 2.9” Installer.
This version will work on both 32-bit and 64-bit systems. However, if you have a 64-bit system, you could choose to install the 64-bit version of MiKTeX instead, but be warned that this version is an experimental version.
Depending on which browser you are using, you may be prompted to open or save the installer. We highly recommend saving the file first, as it is rather large.

Once the file has been saved, run the installer. Proceed through the series of setup steps.
One particular step you may want to be aware of is setting the default paper size. It will save you some trouble if you choose the paper size which is standard in your area (Letter is the standard size in North America).
Once the program is installed, use the program TeXworks to create and edit LaTeX files as described below in the section Creating a Document in TeXworks.
Installing MacTeX on a Mac Operating System
You should install MacTeX, a Mac distribution of LaTeX. To begin, go to http://www.tug.org/mactex/.
Download MacTeX.pkg
Depending on which browser you are using, you may be prompted to open or save the file. We highly recommend saving the file first, as it is rather large. The process may take 1-2 hours or more than that on a slow connection.
There are smaller distributions of LaTeX that you could download, but any additional packages you require would then also need to be downloaded and installed separately. This can be quite a complicated process, so waiting for the file to download will likely save you time in the end.
Once the file has been downloaded completely, find the file and double click it. Follow the instructions to install MacTeX. Installed programs will be placed in a folder called TeX in with your other applications.
Editing LaTeX files
Depending on whether you are on a Mac or PC, there will be a default program that comes with your package that is used to edit your LaTeX files. TeXworks is the editor that comes with the Windows installation, and TeXShop is the editor included in the Mac installation. The instructions in this course will be based primarily on TeXworks, but you should be able to follow along in TeXShop with minimal differences, and my recommendation for Mac users would be to use TeXShop.
There does exist a version of TeXworks for Mac users that you can install separately, but note that there are still going to be some very minor differences from the Windows version. If you would like to install it, grab the dmg here. After opening it, drag the new app into the Applications folder.
Follow the instructions in the next section to create your document.
Creating a Document in TeXworks
When the TeXworks program opens, the main editing window will appear. The large white area is for entering LaTeX commands, as shown below. It should look pretty similar on both Windows and OSX. You’ll note the window above has some differences from the standard settings, all of which can be changed by going to the format menu at the top:
- Font and Font Size (
courier, 12) - Line Numbering (on)
- Syntax Colouring (LaTeX)
Feel free to adjust these settings as you see fit.
Type or copy-and-paste the sample document into the editor:
\documentclass{article}
\begin{document}
Hello, world!
\end{document}
To actually compile the document, click the green button with the triangle icon (a “play” icon) at the top of the window. Every time you do this, it will save the .tex file. The first time, it will ask you where you wish to save the file. TeXworks will generate extra files in addition to the .pdf file, so it could be beneficial to save your document in its own folder, or a folder dedicated to TeX files.
Using ShareLaTeX
- Go to https://www.sharelatex.com in a web browser (we recommend Chrome and Firefox)
- Create an account by pressing Register
- Once registered, click on New Project and in the dropdown box, New Blank Project. Give it a name, for example “Hello World”.
- Going forward, we recommend you create a new project for each week’s assignment.
- Delete all of the pre-written content in the text editor; we want to really start from scratch
- Type or copy-and-paste the sample document into the editor:
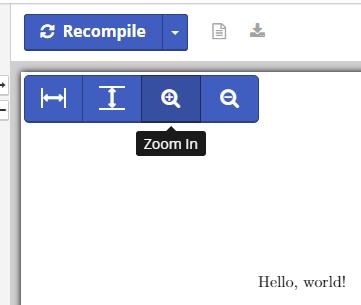
\documentclass{article} \begin{document} Hello, world! \end{document} - Press Recompile on the right-hand side of the screen, which compiles the document
- Your document will be showing! You can zoom in to look at it in more detail.
ShareLaTeX will automatically save your work continuously. Here are a few useful tips:
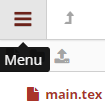
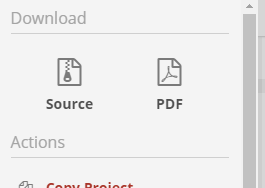
- To download your files, click on the Menu “hamburger button” at the top left, which then gives separate options to download the sources (a .zip containing your .tex file) or .pdf.
- Double-check that you are able to download both the source and the pdf. For some browsers, if it doesn’t work automatically and instead displays your PDF, you may need to (a) right-click on the displayed .pdf and click on “Save as…”, (b) hover over the .pdf and look for a floppy disk icon, or (c) click on the .pdf (to get its focus) and then press Ctrl-S.
- On this author’s browser, looking at the .pdf is easier if I go to the bottom of the Settings and change the PDF Viewer to “native”. This improves the resolution and makes zooming in easier for me. But, your mileage may vary.
- The Back to projects button at top will let you start new projects or switch to others you’ve previously created.
We’re off and running! In the next lesson, you will learn more about what goes into a LaTeX document.